
What is Sous Vide
Sous vide = Immersion circulator = Cryovacking
French translation: “Under vacuum”
Sous vide is a cooking technique in which food is placed in a plastic pouch or a glass jar and cooked in a water bath at a precisely controlled temperature. The temperature is much lower than what is used in traditional cooking methods, and the food is cooked for a longer period of time as a result.
The low cooking temperature ensures that meat will remain juicy, never dry; with consistent results that can’t be achieved with traditional methods. Even tough cuts of meat can be made extremely tender with this method. The food that you cook with this method will be cooked through to precise temperature all the way through. There is usually a quick searing step before serving.
The key advantage of sous vide cooking is that it allows the food to be cooked evenly and consistently, resulting in perfectly cooked dishes every time. The low cooking temperatures also help to preserve the flavor and nutrients in the food, making it a healthier cooking method. Large quantities of food can be prepped hours in advance and held at the perfect temperature until serving time. With the precision of this cooking method, great meals are virtually guaranteed.
To use the sous vide method, you will need a sous vide machine (aka immersion circulator), which is a device that heats and circulates the water in the bath. You will also need a container to hold the water, such as a pot or a container specifically designed for sous vide cooking, and sous vide bags or ziplock bags (or tempered glass jars made for cooking). All of these items can be found on Amazon.

History of Sous Vide:
Sous vide is pretty new to residential kitchens. Originally these immersion circulators were used as scientific laboratory equipment.
In the 1960s, they were used to pasteurize industrial prepared vacuum sealed foods for longer shelf life.
In 1974 Sous Vide made its way into the restaurant scene in France.
Around the same time, Bruno Goussault- economist, inventor, and chef also started experimenting with sous vide.
1980s- Goussault teams up with Joel Robuchon to create a sous vide dining program for the French railroad. Which paved the way for Goussault’s next career move to become chief scientist at Cuisine Solutions in 1989.
Early 2000’s- chefs began to acquire sous vide circulators. Thomas Keller was one of the first. There really wasn’t a rule book for how to cook with this method.
2005 sous vide started to pick up. A cookbook was written and low temperature cooking classes were offered at the French Culinary Cuisine.
2006- sous vide is seen on tv for the first time, on Iron Chef, spiking demand.
The move into residential kitchens remained slow, largely due to high pricing.
2016 ChefSteps released their own circulator, called the Joule, at a price point that made them accessible for home kitchens.
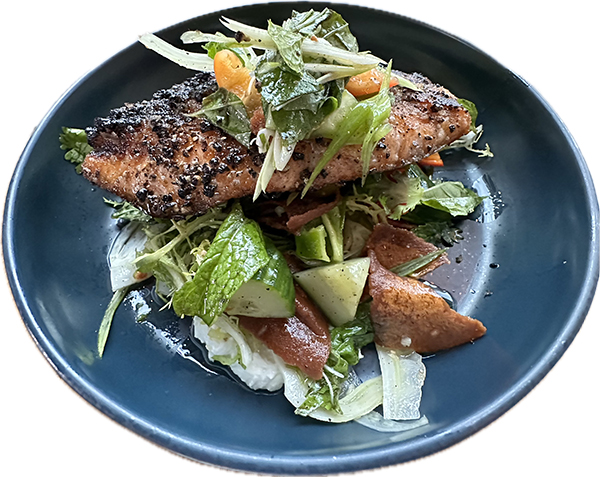
What are the best foods to use the sous vide method for?
There are many foods that can be cooked using the sous vide method, and the best choice will depend on your personal preferences. Some popular options include:
- Meats: Sous vide is particularly well-suited for cooking meats, as it allows for precise temperature control and results in perfectly cooked and tender meats every time. This method is great for cooking steaks, pork chops, chicken breasts, and more.
- Seafood: Sous vide is also a great method for cooking seafood, as it allows for the delicate flavors of the fish or shellfish to be preserved. This method is great for cooking salmon, shrimp, scallops, and more.
- Vegetables: Sous vide cooking can also be used to cook vegetables, such as carrots, beets, and potatoes. The low cooking temperatures allow the vegetables to retain their nutrients and flavor, and they can be cooked to perfection without being overcooked.
- Eggs: Sous vide is a great way to cook eggs, as it allows you to achieve the perfect level of doneness without the risk of overcooking. You can make perfectly cooked soft-boiled eggs or perfectly cooked poached eggs using the sous vide method.
- Desserts: Sous vide can also be used to make a variety of desserts, such as crème brûlée, cheesecake, and chocolate lava cakes. The low cooking temperatures allow the desserts to be cooked slowly and evenly, resulting in perfect consistency every time.
Convenience factor – Sous Vide allows you to prep nicer meals in advance
Sous vide cooking is a convenient way to prepare meals, as it allows you to set the temperature and cooking time in advance and then leave the food to cook unattended. This can be especially useful if you are busy or don’t have a lot of time to spend in the kitchen. It also frees your time to level up the other elements of your meal.
One of the key advantages of sous vide cooking is that it allows you to prepare meals in advance and then store them in the refrigerator or freezer until you are ready to eat. Fine restaurants have meats sous vide cooked on standby, ready to sear to the exact temperature ordered by the diner. This can be a great option for busy individuals or families who want to plan nicer meals with less hands-on time and effort.
Can foods be overcooked with the sous vide method?
Yes. It is possible for foods to be overcooked using the sous vide method, although it is less likely to happen compared to traditional cooking methods. The low cooking temperatures and precise temperature control of the sous vide method mean that it is difficult to overcook most foods.
However, it is still possible to overcook certain foods, such as eggs and some types of seafood, if the cooking time is too long or the water bath temperature is too high. For example, if eggs are cooked sous vide for too long, they can become rubbery and overcooked. Similarly, if seafood is cooked sous vide at too high a temperature, it can become overcooked and tough.
To avoid overcooking foods using the sous vide method, it is important to follow the recommended cooking times and temperatures for the specific type of food you are cooking. It is also a good idea to check the food regularly while it is cooking to ensure that it is being cooked to your desired level of doneness.

Essential Equipment for Sous Vide Cooking:
- Sous Vide Machine – I have Anova and love it. Both the Joule and the Anova are reputable circulators for home use. The Joule features a magnetic base that securely holds it in place to the bottom of a pot, while the Anova sous vide can be attached to the side of your container.
- Container – Options include a Dutch oven, stockpot, or plastic container.
- Plastic Bags – You can find specialized sous vide bags on Amazon or use Ziplock bags for convenience.
- Ventilation for the sear step. This step can get smoky fast and set your smoke detector off- proper kitchen ventilation is important.

Getting Started with Sous Vide:
- Set up your equipment.
- Choose your desired temperature and preheat the water accordingly.
- Seal the food in a bag, ensuring minimal air to prevent buoyancy.
- Submerge the bag in the water, clipping it to the container’s side if needed, and release any remaining air bubbles by partially opening one corner of the Ziplock bag to gently push remaining air out before resealing.
- Cover the water bath with the provided lid or plastic wrap to minimize evaporation.
- While the food cooks, focus on preparing the rest of your meal.
- Once cooked, remove the food from the water bath and allow it to rest for about 5-10 minutes minimum.
- For most meats, a quick sear enhances flavor without overcooking. Be sure to gently blot the liquid from the meat before searing so you don’t steam the meat instead. Sear over high heat, and make sure the meat is dry beforehand.
- If not serving immediately, rapidly chill the food by immersing the bag in an ice bath to halt the cooking process. Once cooled, refrigerate until ready to use.
Equally important is what you do after the meat cooks in the sous vide bath:
Searing or browning meats after cooking them sous vide is a common practice because it helps to add flavor and texture to the finished dish. You will need to blot the meat gently before searing to remove liquids from the sous vide bags and then season the meat and add a fat source (like olive oil or butter) either to the meat or to the pan just before adding the meat. When meat is seared, the high heat will cause the surface of the meat to caramelize, creating a flavorful and crispy crust. This will add an additional layer of flavor to the meat, which is particularly appealing when the meat has been cooked using the sous vide method.
In addition to adding flavor, searing the meat after cooking it sous vide also helps to improve the appearance of the finished dish. Think fine dining appearance!
Some people feel that searing the meat after cooking it sous vide is optional. Ultimately, the decision to sear or not to sear the meat after cooking it sous vide is a matter of personal preference. My personal preference is 100% to SEAR! Searing provides an opportunity that should not be missed to add flavor, crunchy texture, and beautiful appearance. Go for it, *just don’t overdo the sear.
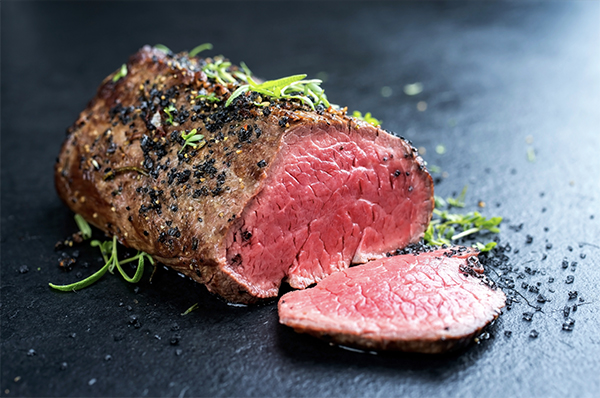
What are the best ways to sear meats after sous vide
There are a few different methods that can be used to sear meats after cooking them sous vide, and the best method will depend on the type of meat and the desired results. Some popular options include:
- Grill: Grilling is a classic method for searing meats, and it can be particularly effective when used to sear meats that have been cooked sous vide. Preheat a grill to high heat, then place the meat on the grill and cook for 1-2 minutes per side, or until a crispy crust has formed.
- Stovetop: If you don’t have access to a grill, you can also sear meats on the stovetop using a high-heat cooking method, such as pan-searing or broiling. Preheat an iron skillet or broiler to high heat, then add the meat and cook for 1-2 minutes per side, or until a crispy crust has formed.
- Oven: Another option is to sear the meat in the oven using the broil setting. Preheat the oven to the broil setting, then place the meat on a baking sheet and cook for 1-2 minutes per side, or until a crispy crust has formed.
- Culinary torch: big or even a small creme brûlée torch, both work.
I have tried them all. The important thing to remember is that the meat is already cooked to temperature all the way through when you pull it out of the water bath so you DON’T want to create the equivalent of a twice baked potato or biscotti- we only want this to be ONCE COOKED so your goal is a quick sear over high heat. If you overdo it, that perfectly tender and juicy meat will become overcooked and tough. Let the meat rest for about 10-15 minutes before searing bring the temperature down a little, which will help prevent the meat from getting overcooked in the sear stage. With that in mind, my personal preference is a super hot iron skillet for a sear that is quick enough to create a crisp brown outside. Works great, and leaves you with the base to make a quick sauce if you are so inclined.
No matter which method you choose, it’s important to make sure that the surface of the meat is dry (gently patted) before searing, as this will help to ensure that the sear is crisp and flavorful. Otherwise, you will find that you are steaming the meat and not getting the beautiful browning and crispy crust. You may also want to add a small amount of oil or fat to the meat, pan or grill to help prevent the meat from sticking. The butter/oil and seasonings will build additional flavor- experiment with this and have fun with it, the possibilities are many and this is the stage to get creative. Finally, be sure to allow the meat to rest for a few minutes before slicing or serving, as this will help to lock in the juices and tenderness.
Temperature and time settings
Here’s where it gets tricky. Or precise. I have experimented quite a bit with time and temp and found settings that worked best for me, so I created a personal crib sheet to share with you that I swear by:

Here are a few things to try sous vide (using time and temps in above chart):
- Sous vide pork chops with herb butter: Season pork chops with your favorite herbs and spices, then seal them in a vacuum-sealed bag with a pat of herb butter. Cook them in a sous vide bath, then sear them in a hot pan for a crispy crust.
- Sous vide salmon with avocado salsa: Season salmon fillets with salt, pepper, and your choice of herbs, then seal them in a vacuum-sealed bag. Cook them in a sous vide bath, then serve with a fresh avocado salsa made from diced avocado, tomato, red onion, and lime juice.
- Sous vide steak with red wine reduction: Season steak with salt, pepper, and your choice of herbs, then seal it in a vacuum-sealed bag. Cook it in a sous vide bath. In the meantime, make a red wine reduction by simmering red wine, shallots, and herbs in a saucepan until it’s reduced by half. *Pro searing tip for steaks- coat them generously with mayonnaise, salt and pepper before searing. The results are incredible and nobody will ever know you did. Serve the steak with the red wine reduction on the side or over the top.
- Sous vide chicken with lemon and herb sauce: Season chicken breasts with salt, pepper, and your choice of herbs, then seal them in a vacuum-sealed bag. Cook them in a sous vide bath, then make a quick lemon and herb sauce by mixing together lemon juice, minced garlic, and chopped herbs in a small saucepan. Serve the chicken with the lemon and herb sauce drizzled over the top.
- Sous vide vegetables with vinaigrette: Cut your choice of vegetables into bite-sized pieces, then seal them in a vacuum-sealed bag with a simple vinaigrette made from olive oil, vinegar, mustard, and your choice of herbs and spices. Cook the vegetables in a sous vide bath, then serve as a side dish or add them to a salad.
Sous Vide- Your Questions Answered:
What If My Plastic Bag Floats?
Here are some solutions:
- Attach a large binder clip to the bottom of the sous vide bag and secure a heavy spoon inside the clip.
- If your recipe suggests double bagging, insert a couple of heavy spoons into the outer bag.
- Place an inverted steamer basket over the floating bag and add extra weight, such as heavy spoons, on top of the basket.
Why are there time ranges in the recipes?
The concept is that any duration within the recipe’s range will produce satisfactory results. The lower end of the range achieves the desired outcome in the shortest time, while the upper end represents the maximum cooking time without adverse effects on the food.
Are there any ingredients unsuitable for sous vide cooking?
YES. Garlic poses a particular risk of botulism, especially in warm, oxygen-deprived environments like sous vide cooking. Therefore, it’s advisable to opt for granulated garlic powder or omit garlic altogether instead of using fresh garlic.
Is there anything important to consider during the searing stage after sous vide cooking?
Great question. Allow the meat to rest briefly before searing to lower its temperature slightly, minimizing the risk of overcooking when it gets the hot sear.
If you have any questions, don’t hesitate to email me at courtney @ courtneyprice.com


Leave a Reply